Building a To-Do List App with React and Redux: Sounds simple, right? Wrong. This seemingly straightforward project is a masterclass in modern web development, diving deep into the power of React’s component-based architecture and Redux’s state management prowess. We’ll walk you through setting up your project, designing a clean data structure, crafting elegant reducers and actions, and building a slick UI. Get ready to level up your React skills!
From project initialization and Redux configuration to crafting the user interface and connecting it all to the Redux store, we’ll cover every step of the process. We’ll even touch on advanced features like persistence and sorting, transforming your basic to-do list into a fully-fledged productivity powerhouse. Think of this as your ultimate guide to building a robust, scalable, and – dare we say – beautiful to-do list app.
Project Setup and Initialization
Alright, buckle up, future app developers! Building a to-do list app with React and Redux is a journey, but the first step – setting up the project – is surprisingly straightforward. We’ll navigate the initial setup, ensuring a solid foundation for your awesome to-do list. Think of this as laying the groundwork for your digital masterpiece.
Setting up a React project and integrating Redux involves a few key steps. We’ll cover creating the React project, installing the necessary packages, structuring the project directory for easy navigation, and finally, configuring the Redux store. Let’s get started!
Creating a React Project with Create React App
Create React App (CRA) is the go-to tool for bootstrapping React projects. It simplifies the setup process significantly, handling all the configuration for you. This allows you to focus on building your application’s functionality rather than wrestling with Webpack configurations. To create a new React project, open your terminal and run the following command:
npx create-react-app my-todo-list
Replace my-todo-list with your desired project name. CRA will then download and install all the necessary dependencies, creating a basic React project structure. After installation is complete, navigate into the project directory using cd my-todo-list.
Installing and Configuring Redux
With your React project created, it’s time to bring in Redux. Redux is a predictable state container for JavaScript apps. It helps manage the application’s state in a centralized and organized way, making it easier to reason about and debug your code. We’ll use npm (or yarn) to install the necessary Redux packages:
npm install redux react-redux @reduxjs/toolkit
@reduxjs/toolkit simplifies Redux setup by providing helpful utilities and functions. We’ll leverage this toolkit to streamline the process.
Project Directory Structure
A well-organized project directory is crucial for maintainability, especially as your app grows. A common and effective structure looks something like this:
The key is to group related files together. This makes it easier to find and modify code, improving overall development efficiency and reducing frustration. Imagine trying to find a specific component in a chaotic mess of files – a nightmare! A well-structured project is your sanity saver.
Initial Redux Store Setup
Let’s create the initial Redux store using @reduxjs/toolkit. This involves creating a slice to manage the to-do items. Here’s an example:
import configureStore, createSlice from '@reduxjs/toolkit';const todoSlice = createSlice(
name: 'todos',
initialState: [],
reducers:
addTodo: (state, action) =>
state.push(action.payload);
,
removeTodo: (state, action) =>
return state.filter((todo) => todo.id !== action.payload);
,
toggleComplete: (state, action) =>
const index = state.findIndex((todo) => todo.id === action.payload);
state[index].completed = !state[index].completed;);
export const addTodo, removeTodo, toggleComplete = todoSlice.actions;
export const store = configureStore(
reducer:
todos: todoSlice.reducer);
This code defines a slice to manage to-do items, including actions to add, remove, and toggle their completion status. The configureStore function sets up the Redux store with the todo slice reducer. This is the core of your state management – the brain of your to-do list app.
Defining the Data Structure (Redux Store)
Source: githubassets.com
So, you’ve got your React app scaffolding all set up, ready to conquer the world of to-do lists. But before you start slinging React components like confetti, we need a solid foundation: your Redux store. Think of it as the central nervous system of your app, holding all the crucial data. This is where we’ll keep track of those precious to-do items, ensuring everything stays organized and accessible. Getting this right is key to a smooth, efficient app.
The Redux store will hold an array of to-do items. Each item needs specific information: a unique ID, the task description itself, and its completion status. This structured approach keeps everything neat and prevents confusion, making updates and manipulations much easier. We’ll use plain JavaScript objects to represent this data; it’s simple, efficient, and perfectly suited for Redux.
Redux Store Initial State
The initial state defines the starting point of our application’s data. It’s essentially an empty to-do list, ready to be populated with tasks as the user adds them. This initial state is a constant, providing a clear and consistent starting point for our reducer function. This ensures predictability and helps avoid unexpected behavior.
“`javascript
const initialState =
todos: []
;
“`
This simple object, `initialState`, sets the `todos` array to an empty array. This means when the app first loads, the to-do list is empty, just as expected. As users add and modify tasks, this array will populate with the corresponding data.
Reducer Function Creation
Reducers are pure functions that take the current state and an action as input and return a new state. They are the heart of how Redux manages data changes. Importantly, they are *pure* functions – meaning they don’t modify the existing state directly; they create a completely new state object. This ensures predictability and avoids side effects, making debugging and testing much simpler. Let’s craft a basic reducer:
“`javascript
const todoReducer = (state = initialState, action) =>
switch (action.type)
case ‘ADD_TODO’:
return …state, todos: […state.todos, action.payload] ;
case ‘TOGGLE_TODO’:
return
…state,
todos: state.todos.map((todo) =>
todo.id === action.payload.id ? …todo, completed: !todo.completed : todo
),
;
default:
return state;
;
“`
This reducer handles two actions: `ADD_TODO` (adding a new to-do) and `TOGGLE_TODO` (toggling the completion status of a to-do). The `switch` statement checks the `action.type` to determine which action to perform. Notice the use of the spread operator (`…`) to create new objects and arrays without mutating the original state. This is crucial for maintaining the purity of the reducer. The `default` case returns the original state if the action type is not recognized. This safeguards against unexpected actions.
Implementing Actions and Reducers
Okay, so we’ve got our Redux store set up – the central hub for our to-do list app’s data. Now, it’s time to build the mechanisms that actually *change* that data: actions and reducers. Think of actions as messengers delivering instructions, and reducers as the diligent workers who update the state based on those instructions. This dynamic duo ensures our app stays in sync with user interactions.
Actions are plain JavaScript objects that describe what happened in the application. Reducers are pure functions that take the current state and an action, and return a new state. This “pure” aspect is crucial for predictability and testability. Let’s dive into the specifics.
Action Creators for To-Do List Management
Action creators are functions that create actions. They handle the details of constructing the action object, ensuring consistency and readability. Here’s how we’d implement them for our to-do list:
Each action creator returns an action object with a `type` property (identifying the action) and any necessary payload (data). Using constants for action types improves code readability and reduces errors.
// action-types.js
export const ADD_TODO = 'ADD_TODO';
export const REMOVE_TODO = 'REMOVE_TODO';
export const TOGGLE_TODO = 'TOGGLE_TODO';
export const EDIT_TODO = 'EDIT_TODO';

// actions.js
import  ADD_TODO, REMOVE_TODO, TOGGLE_TODO, EDIT_TODO  from './action-types';

export const addTodo = (text) => (
  type: ADD_TODO,
  payload:  text
);

export const removeTodo = (id) => (
  type: REMOVE_TODO,
  payload:  id
);

export const toggleTodo = (id) => (
  type: TOGGLE_TODO,
  payload:  id
);

export const editTodo = (id, newText) => (
  type: EDIT_TODO,
  payload:  id, newText
);
Reducer Implementation for State Updates
The reducer is where the magic happens. It takes the current state and an action, and returns a *new* state reflecting the changes. Remember, reducers must be pure functions – they should not mutate the existing state. Instead, they create a completely new state object.
// reducer.js
import  ADD_TODO, REMOVE_TODO, TOGGLE_TODO, EDIT_TODO  from './action-types';

const initialState = [];

const todoReducer = (state = initialState, action) =>
  switch (action.type)
    case ADD_TODO:
      return [...state,  id: Date.now(), text: action.payload.text, completed: false ];
    case REMOVE_TODO:
      return state.filter(todo => todo.id !== action.payload.id);
    case TOGGLE_TODO:
      return state.map(todo =>
        todo.id === action.payload.id ?  ...todo, completed: !todo.completed  : todo
      );
    case EDIT_TODO:
      return state.map(todo =>
        todo.id === action.payload.id ?  ...todo, text: action.payload.newText  : todo
      );
    default:
      return state;

;

export default todoReducer;
Action Types, Descriptions, and Reducer Actions
This table summarizes the actions and their effects on the reducer:
| Action Type | Description | Reducer Action |
|---|---|---|
| ADD_TODO | Adds a new to-do item to the list. | Adds a new object to the state array, including a unique ID, text, and a `completed` flag set to `false`. |
| REMOVE_TODO | Removes a to-do item from the list. | Filters the state array, removing the item with the matching ID. |
| TOGGLE_TODO | Toggles the completion status of a to-do item. | Updates the `completed` property of the matching item in the state array. |
| EDIT_TODO | Edits the text of an existing to-do item. | Updates the `text` property of the matching item in the state array. |
Building the User Interface (UI) Components
Now that our Redux store is humming along, it’s time to bring our to-do list to life with a slick user interface. We’ll craft React components to handle adding, displaying, and managing our tasks, making the whole experience intuitive and enjoyable. This section dives into the creation of the core UI elements that will form the backbone of our application.
We’ll be focusing on three key components: `AddToDoComponent`, `ToDoItemComponent`, and `ToDoListComponent`. Each will play a crucial role in providing a seamless user experience. These components will handle user input, display the to-do items, and allow for interactions like editing and deleting entries. The power of JSX will be harnessed to efficiently render these elements, blending the logic and presentation seamlessly.
AddToDoComponent
This component is responsible for allowing users to add new tasks to the list. It consists of an input field for the task description and a button to submit the new task. The component uses controlled components, meaning the component’s state manages the input value. On submission, it dispatches an action to add the new task to the Redux store.
- A text input field for entering the to-do item description.
- A button to submit the new to-do item to the list.
- Handles user input and updates the component’s internal state.
- Dispatches a Redux action to add the new item to the store upon submission.
Here’s a simplified example of the `AddToDoComponent` using functional component and hooks:
“`javascript
import React, useState from ‘react’;
import useDispatch from ‘react-redux’;
import addTodo from ‘./actions’; // Import your Redux action
const AddToDoComponent = () =>
const [inputValue, setInputValue] = useState(”);
const dispatch = useDispatch();
const handleInputChange = (event) =>
setInputValue(event.target.value);
;
const handleSubmit = (event) =>
event.preventDefault();
if (inputValue.trim() !== ”)
dispatch(addTodo(inputValue));
setInputValue(”);
;
return (
);
;
export default AddToDoComponent;
“`
ToDoItemComponent
This component renders a single to-do item from the Redux store. It displays the task description and provides buttons for editing and deleting the item. Upon interaction with these buttons, it dispatches appropriate Redux actions to update or remove the item.
- Displays the description of a single to-do item.
- Includes buttons for editing and deleting the item.
- Dispatches Redux actions to update or remove the item from the store.
- Potentially includes a checkbox to mark the item as complete.
ToDoListComponent
This component fetches the to-do items from the Redux store and renders them using `ToDoItemComponent`. It provides a clear and organized view of the entire to-do list. This component acts as a container, managing the rendering of multiple `ToDoItemComponent` instances.
- Fetches the to-do list from the Redux store.
- Renders each to-do item using the `ToDoItemComponent`.
- Provides a clear and organized view of the complete to-do list.
- Might include features like sorting or filtering the list.
Connecting UI with Redux Store
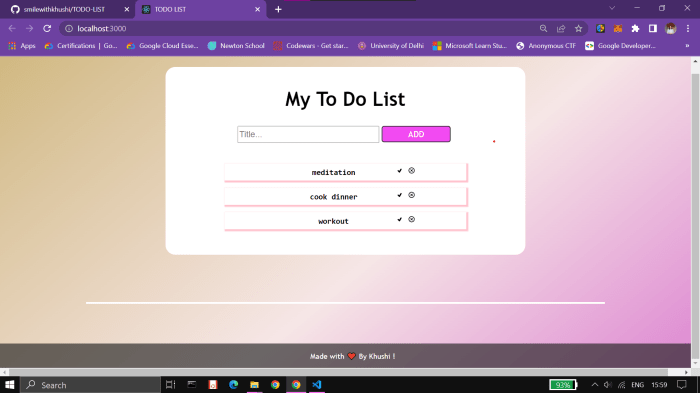
Source: githubusercontent.com
Alright, folks, we’ve built our Redux store and our React components. Now comes the fun part: connecting them! This is where the magic happens, the data flows, and our to-do list comes alive. We’ll use React-Redux’s `connect` function to bridge the gap between our UI and the central data hub.
Connecting our components to the Redux store involves using the `connect` function from `react-redux`. This function acts as a bridge, allowing our components to access and modify the Redux store’s state. It’s essentially a higher-order component (HOC) that wraps our existing components, providing them with the necessary props to interact with Redux. Understanding this process is key to building a robust and maintainable React application.
Mapping State to Props
The `connect` function takes two arguments: `mapStateToProps` and `mapDispatchToProps`. `mapStateToProps` is a function that takes the entire Redux store state as input and returns an object. This object’s properties become props available to the connected component. This allows our components to access the specific parts of the state they need, without needing to dive into the entire store structure. For instance, if our store contains a `todos` array, `mapStateToProps` can extract just that array and pass it as a prop.
“`javascript
const mapStateToProps = (state) =>
return
todos: state.todos
;
;
“`
This snippet shows how to map the `todos` array from the Redux store’s state to a prop called `todos` in our component. The component can then directly access this prop to render the to-do items.
Mapping Dispatch to Props
The `mapDispatchToProps` function takes the `dispatch` function from Redux as an argument and returns an object whose properties are functions that dispatch actions. This allows our components to trigger changes in the Redux store. For example, we might have an action creator called `addTodo` that adds a new to-do item to the store. `mapDispatchToProps` can make this action creator available as a prop to our component.
“`javascript
const mapDispatchToProps = (dispatch) =>
return
addTodo: (text) => dispatch(addTodo(text))
;
;
“`
Here, `addTodo` is now a prop that, when called, dispatches the `addTodo` action with the provided text. This makes interacting with the Redux store straightforward within our component.
Connecting the Component
Finally, we use `connect` to combine `mapStateToProps` and `mapDispatchToProps`, wrapping our component.
“`javascript
import connect from ‘react-redux’;
const TodoList = (props) =>
// … component code …
return (
);
;
export default connect(mapStateToProps, mapDispatchToProps)(TodoList);
“`
This code snippet shows how to connect the `TodoList` component to the Redux store, allowing it to access the `todos` prop and dispatch the `addTodo` action.
Handling Asynchronous Actions with Redux Thunk
Fetching data from a server often involves asynchronous operations. Redux Thunk is a middleware that allows us to dispatch functions instead of plain objects as actions. These functions can contain asynchronous logic, such as API calls, and dispatch actions when the asynchronous operation completes.
Let’s say we want to fetch to-dos from a server. We could write a thunk action creator like this:
“`javascript
const fetchTodos = () =>
return (dispatch) =>
fetch(‘/api/todos’)
.then(response => response.json())
.then(todos => dispatch(setTodos(todos)))
.catch(error => dispatch(setTodosError(error)));
;
;
“`
This thunk dispatches `setTodos` with the fetched data upon success, and `setTodosError` upon failure. The component can then handle these actions accordingly. This pattern keeps asynchronous logic separate from the component’s rendering logic, making the code cleaner and easier to maintain.
Implementing Advanced Features (Optional)
Level up your to-do list app from a basic task manager to a productivity powerhouse by adding some seriously slick advanced features. These enhancements not only boost functionality but also demonstrate a deeper understanding of React and Redux, making your app a true testament to your coding prowess. Let’s dive into some seriously cool upgrades.
Adding these optional features transforms your simple to-do list app into a robust and user-friendly tool. Each feature builds upon the foundation already established, requiring a thoughtful approach to integration and design. The payoff, however, is a significantly improved user experience and a more polished application.
Building a To-Do List app with React and Redux is a great way to learn frontend development, mastering state management and component interactions. But if you’re itching to build something for a wider audience, consider expanding your horizons; check out this guide on Getting Started with Android App Development to explore native mobile app creation. Then, you can bring your To-Do List app to a whole new level of user experience!
Persisting To-Do List Data
Persisting data ensures your to-do list survives browser refreshes or closures. This is achieved using local storage, a simple mechanism built into browsers. Alternatively, for larger applications or collaborative projects, a database solution (like Firebase or a backend server) provides more scalability and security. Local storage is ideal for this tutorial’s scope. The process involves saving the Redux store’s state to local storage whenever it changes and loading it on application startup. This ensures data persistence across sessions. We can leverage the `localStorage` API’s `setItem` and `getItem` methods for this. Consider using JSON.stringify and JSON.parse to handle data serialization and deserialization. Error handling is crucial, gracefully handling cases where local storage might be unavailable.
Filtering and Sorting To-Do Items, Building a To-Do List App with React and Redux
Filtering and sorting functionalities allow users to manage their tasks effectively. Filtering could involve options like showing only completed tasks, pending tasks, or tasks with specific tags. Sorting could be implemented by due date, priority, or creation time. In your React component, you’ll add input fields or dropdown menus for filtering criteria and sorting options. The Redux store will remain the single source of truth, updating based on user selections. The UI component will then filter and sort the data received from the store before rendering it. This can be implemented using JavaScript’s array methods like `filter` and `sort`.
Displaying Task Statistics
A statistics component provides a clear overview of task progress. This component would display the total number of tasks, the number of completed tasks, and the number of pending tasks. This component would fetch the necessary data from the Redux store. It could visually represent the data using charts or simple progress bars, offering an at-a-glance summary of productivity. Consider calculating and displaying percentages of completed vs. pending tasks for a more comprehensive overview. This provides valuable insight into the user’s task completion rate.
Implementing Drag-and-Drop Reordering
Drag-and-drop functionality allows for intuitive reordering of tasks. Libraries like React DnD simplify the implementation of drag-and-drop interactions. The core functionality involves defining drag and drop source and target components. When a user drags an item, its index is updated in the Redux store, reflecting the new order. The UI automatically re-renders based on this updated state. This requires careful handling of the state updates to maintain consistency and avoid race conditions. Error handling is crucial here to prevent unexpected behavior during the drag-and-drop process. Consider providing visual feedback to the user during the drag-and-drop operation, indicating the current drop location.
Testing the Application: Building A To-Do List App With React And Redux
Building a robust to-do list app isn’t just about pretty visuals and slick functionality; it’s about ensuring everything works as expected, consistently. That’s where testing comes in – your safety net against unexpected bugs and a guarantee of a smooth user experience. Think of testing as quality control for your code, ensuring that each component works in harmony and the whole app performs flawlessly.
Testing your React and Redux application involves a multi-pronged approach, focusing on both individual components and the overall integration. We’ll dive into unit testing (testing individual pieces) and integration testing (testing how those pieces work together). By adopting a comprehensive testing strategy, you’ll build a more reliable and maintainable application.
Unit Testing Reducers and Components
Unit tests are like microscopic examinations of your code. They isolate individual parts – reducers and components – to verify their behavior in isolation. This helps identify and fix problems early, before they cascade into larger issues. For reducers, we check if they correctly update the state based on different actions. For components, we verify that they render correctly and respond appropriately to user interactions. We’ll use Jest, a popular JavaScript testing framework, and React Testing Library, which focuses on testing from the user’s perspective.
Unit Test Example: Reducer
Let’s imagine a simple reducer that manages the to-do items. A unit test might look like this (using Jest):
“`javascript
import ADD_TODO, TOGGLE_TODO from ‘../actions’;
import todoReducer from ‘../reducers/todos’;
describe(‘todoReducer’, () =>
it(‘should handle ADD_TODO’, () =>
const initialState = [];
const action =
type: ADD_TODO,
payload: text: ‘Buy milk’
;
const newState = todoReducer(initialState, action);
expect(newState).toEqual([ text: ‘Buy milk’, completed: false ]);
);
it(‘should handle TOGGLE_TODO’, () =>
const initialState = [ text: ‘Buy milk’, completed: false ];
const action =
type: TOGGLE_TODO,
payload: 0
;
const newState = todoReducer(initialState, action);
expect(newState).toEqual([ text: ‘Buy milk’, completed: true ]);
);
);
“`
This test suite checks the reducer’s behavior for `ADD_TODO` and `TOGGLE_TODO` actions. Jest’s `expect` function allows us to assert that the new state matches our expectations.
Unit Test Example: Component
Now let’s look at a component test, using React Testing Library:
“`javascript
import render, screen, fireEvent from ‘@testing-library/react’;
import TodoItem from ‘../components/TodoItem’;
test(‘TodoItem toggles completion’, () =>
const todo = text: ‘Walk the dog’, completed: false ;
render(
const checkbox = screen.getByRole(‘checkbox’);
fireEvent.click(checkbox);
expect(checkbox).toBeChecked();
);
“`
This test renders the `TodoItem` component, finds the checkbox using `screen.getByRole`, simulates a click using `fireEvent.click`, and then checks if the checkbox is checked. React Testing Library encourages testing from the user’s perspective, making tests more robust and maintainable.
Integration Testing Strategies
Integration tests check how different parts of your application work together. They’re more complex than unit tests but crucial for catching issues that arise from interactions between components and the Redux store. Strategies include testing user flows (e.g., adding a to-do item, marking it as complete), and verifying that data flows correctly between the UI and the Redux store. Tools like Cypress or Selenium can be used for end-to-end integration tests, simulating real user interactions.
Using Jest and React Testing Library
Jest provides a comprehensive testing environment, including mocking, test runners, and assertion libraries. React Testing Library complements Jest by focusing on testing components from a user’s perspective, promoting more user-centric and robust tests. Setting up Jest and React Testing Library is straightforward, with clear documentation and many tutorials available online. They work seamlessly together to provide a powerful testing framework for your React application.
Last Point
So there you have it – a complete walkthrough of building a to-do list app using React and Redux. You’ve learned how to manage application state efficiently, create reusable components, and connect your UI to your data seamlessly. While a to-do list might seem small, the principles you’ve learned here are applicable to much larger and more complex projects. Go forth and build amazing things!
